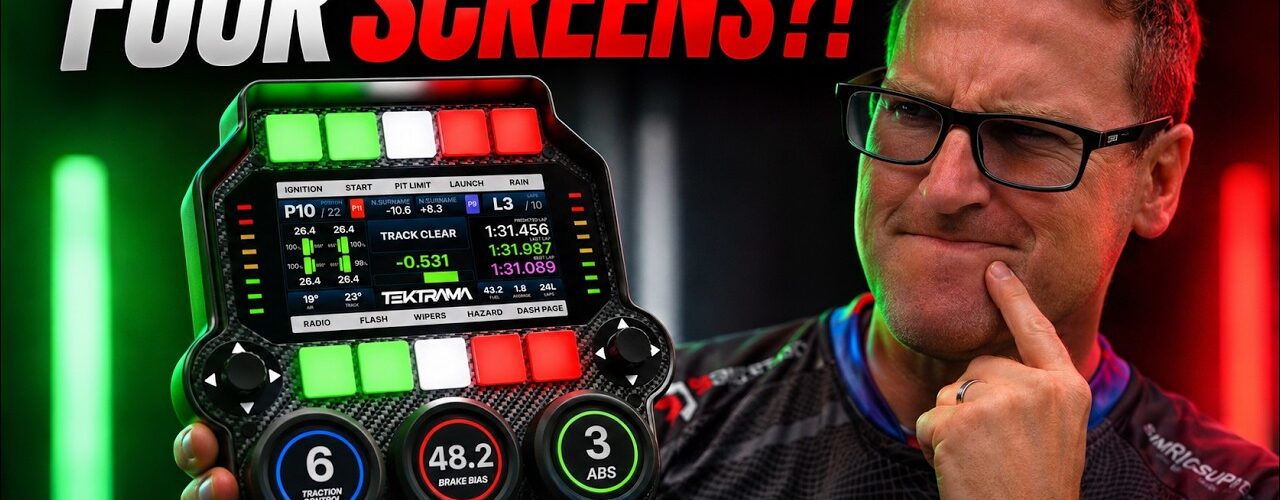
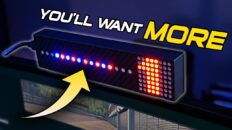
I’m terrible at managing fuel. Spending €650 on a dash is an extravagant way to tackle that, especially when my steering wheel already tells me how much fuel I have left. Yet after fitting the TEKTRAMA Core Control Panel beside my shifter and trying it in iRacing, the fuel page is the one I keep coming back to. I can leave it there for the whole stint and still have my usual dash in front of me.
| Logo | Brands | Reseller | Discount Code | Link | Ships to | Locations |
|---|---|---|---|---|---|---|
 | Fanatec | Fanatec USA | https://laurencedusoswa.com/a/FANATEC-USA | America | Beverly Hills, California, USA | |
| Fanatec | Fanatec EU | https://laurencedusoswa.com/a/FANATEC-EU | EU | Landshut, Germany | |
| Fanatec | Fanatec Australia | https://laurencedusoswa.com/a/FANATEC-OZ | Australia | New South Wales, Australia | |
| Fanatec | Fanatec Japan | https://laurencedusoswa.com/a/FANATEC-JP | Japan | Tokyo, Japan | |
 | BDH, Conspit, Cube Controls, D-BOX, Heusinkveld, Logitech, MOZA, Pimax, Qubic System, Rexing, Simagic, Simucube, Trak Racer, VNM | Trak Racer USA | https://laurencedusoswa.com/a/TRAK-RACER-USA | America | Austin, Texas, USA | |
| BDH, Conspit, Cube Controls, D-BOX, Heusinkveld, Pimax, Qubic System, Rexing, Simagic, Simucube, Trak Racer, VNM | Trak Racer UK | https://laurencedusoswa.com/a/TRAK-RACER-UK | UK | Hertfordshire, England, UK | |
| BDH, Conspit, Cube Controls, D-BOX, Heusinkveld, MOZA, Pimax, Qubic System, Rexing, Simagic, Simucube, Trak Racer, VNM | Trak Racer EU | https://laurencedusoswa.com/a/TRAK-RACER-EU | EU | Venlo, The Netherlands | |
| BDH, BWT Alpine Formula One Team, Conspit, Cube Controls, D-BOX, Heusinkveld, Hot Wheels, Pimax, Qubic System, Rexing, Simagic, Simucube, Trak Racer, VNM | Trak Racer Australia | https://laurencedusoswa.com/a/TRAK-RACER-OZ | Australia | Victoria, Australia | |
 | Asetek | Asetek Global | 5% off with coupon code 'LD' | https://laurencedusoswa.com/a/ASETEK-GLOBAL | Global | Florida, USA. Aalborg, Denmark |
| Asetek | Asetek USA | 5% off with coupon code 'LD' | https://laurencedusoswa.com/a/ASETEK-USA | America | Florida, USA |
| Asetek | Asetek EU | 5% off with coupon code 'LD' | https://laurencedusoswa.com/a/ASETEK-EU | EU | Aalborg, Denmark |
 | Simagic | Simagic Direct | 3% off with coupon code 'LD' | https://laurencedusoswa.com/a/SIMAGIC | Global | Shenzhen, China, Asia |
 | Fanatec, GT Omega, HORI, Logitech G, MOZA Racing, Next Level Racing, Playseat, PXN, Thrustmaster, DIWANGUS | Amazon Global (will bring you to your local amazon store automatically) | https://laurencedusoswa.com/a/AMAZON | Global | ||
 | Apex Sim Racing, Cube Controls, D-BOX, Elgato, MOZA Racing, Pimax, Sabelt Sim Racing, Simagic, Simnet Racing, Simucube | Apex Sim Racing | 5% off with coupon code 'LD' | https://laurencedusoswa.com/a/APEX-SIM-RACING | Global | New Jersey, USA |
 | Advanced SimRacing, Ascher Racing, Base Performance Simulators, BavarianSimTec, BDH Race Sim Hardware, ButtKicker, Cube Controls, Daniel Newman Racing, D-BOX Technologies, Delta Sim-Tech, Gomez Sim Industries, Heusinkveld, IgnitiON Controls, Logitech, Max Papis Innovations, MME Motorsport, MOZA Racing, Novus Racing Simulators, P1Sim, Playseat, Precision Sim Engineering, Qubic System, Simucube, Sparco, Thrustmaster, Vero Motion, VNM Simulation, VPG Sim | Advanced Sim Racing | 5% off with code LDUSOSWAFIVE | https://laurencedusoswa.com/a/ASR | Global | Montreal, Canada |
 | Ascher Racing, ASUS, Base Performance Simulators, BDH Race Sim Hardware, ButtKicker, Cobra, Cube Controls, EPOS, Fanatec, Gigabyte, Go-Race, Gomez Sim Industries (GSI), Heusinkveld Engineering, ImSim, MME SimSport, MOZA, OBP, O-Rouge, Overclockers, Qubic System, Racelogic, Rexing, Sabelt Sim Racing, Samsung, Simucube, Simtag, Simtrecs, Sparco, Trak Racer, VPG Sim | Demon Tweeks | https://laurencedusoswa.com/a/DEMON-TWEEKS | Global | Wrexham, Wales, UK | |
 | bruzzi, ButtKicker, Conspit, Marina Racewear, MOZA Flight, MOZA Racing, Next Level Racing, Pro Simrig, Qubic System, Racing Sims, Sim Did, Simagic, Simetik, Simforge, Soelpec, Vero Motion | Abruzzi | https://laurencedusoswa.com/a/ABRUZZI | UK, EU | East-Sussex, England, UK | |
 | Streamlabs | Streamlabs | https://laurencedusoswa.com/a/STREAMLABS | Global | ||
| Restream | Restream | https://laurencedusoswa.com/a/RESTREAM | Global | |||
 | iRacing | iRacing | https://laurencedusoswa.com/a/IRACING | Global | Chelmsford, Massachusetts, USA | |
 | Coach Dave Delta | Coach Dave Academy | https://laurencedusoswa.com/a/CDA | Global | London, England, UK | |
 | Soelpec | Soelpec | https://laurencedusoswa.com/a/SOELPEC | Global | Istanbul, Turkey | |
 | Moza | Moza UK | https://laurencedusoswa.com/a/MOZA-UK | United Kingdom | UK | |
| Moza | Moza US | https://laurencedusoswa.com/a/MOZA-US | North & South America | USA | |
| Moza | Moza EU | https://laurencedusoswa.com/a/MOZA-EU | Global | Europe | |
| Moza | Moza Direct | https://laurencedusoswa.com/a/MOZA | Global | Shenzhen, China, Asia | |
 | Cobra, PRO SIMRIG, Qubic System, SIMAGIC, Sparco | RaceAnywhere | 5% off with coupon code 'LD' | https://laurencedusoswa.com/a/RACE-ANYWHERE | UK, EU | Northamptonshire, UK |
 | Grid Engineering, Sim-Lab, Sparco | Sim-Lab Direct | https://laurencedusoswa.com/a/SIM-LAB | Global | Tholen, The Netherlands, EU | |
 | Cammus | Cammus Direct | 5% off with code LDCAMMUS | https://laurencedusoswa.com/a/CAMMUS | Global | China, Asia |
 | Buttkicker | Buttkicker Direct | https://laurencedusoswa.com/a/BUTTKICKER | Global | Ohio, USA | |
 | Apex Sim Racing, Asetek SimSports, Gomez Sim Industries, Next Level Racing, SimSportGadget, Simtrecs, Simucube | SimRaceCity | 5% off with promocode: potato-nation | https://laurencedusoswa.com/a/SRC | USA | Fort Worth, Texas, USA |
 | Extreme Simracing, Simagic, D-BOX, DBOX | Extreme Simracing | https://laurencedusoswa.com/a/EXTREME-SIMRACING | America | Maringá, Paraná, Brazil | |
 | Ascher Racing, BavarianSimTec, SimRacingBay, Simucube | SimRacingBay | https://laurencedusoswa.com/a/SIMRACINGBAY | Global | Slovenia, EU | |
 | Simforge Engineering | Simforge Engineering | https://laurencedusoswa.com/a/SIMFORGE | Global | Chennai, India, ASIA | |
 | Website Hosting | HostGator | https://laurencedusoswa.com/a/HOST-GATOR | Global | USA | |
| RacGTing Racing Cockpits | RacGTing | https://laurencedusoswa.com/a/RACGTING | Global | Asia | ||
 | Getail Design | Getail Design | 5% off with coupon code 'LD' | https://laurencedusoswa.com/a/GETAIL | Global | Bergamo, Italy, EU |
 | Pimax | Pimax EU | https://laurencedusoswa.com/a/PIMAX-EU | EU | EU | |
| Pimax | Pimax | https://LaurenceDusoswa.com/a/PIMAX | Global | Shanghai , China | |
 | Asetek, Cube Controls, Fanatec, Sim Lab, Simagic | IRL Motorsports | https://laurencedusoswa.com/a/IRL-MOTORSPORTS | EU, UK | Dublin, Ireland | |
 | BDH | BDH Sim Hardware | https://laurencedusoswa.com/a/BDH | Global | Pocklington, York, UK | |
 | BDH, CAMMUS, Conspit, DOF Reality, Fanatec, Heusinkveld, MOZA Racing, PXN, Qubic System, Race Sim, Simnet Racing | RACESIM UK | 5% off with coupon code 'LD' | https://laurencedusoswa.com/a/RACESIMUK | UK, EU | London, UK |
 | Asetek SimSports, Conspit, Corbeau, Cube Controls, DOF Reality, Fanatec, Gomez Sim Industries (GSI), Heusinkveld, Leoxz, Moza, Sabelt, SIM HQ, Sim-Lab, Simagic, SRP, VRS | Simpatico Sim Shop | 5% off with coupon code 'POTATONATION' | https://laurencedusoswa.com/a/SIMPATICO | USA, Canada | Jacksonville FL, USA |
 | Conspit | iracesimulators | 10% off with code 'LD' | https://laurencedusoswa.com/a/IRACESIMULATORS | EU | Dublin, Ireland |
 | Bavarian Sim Tec | Bavarian Sim Tec | 5% off with coupon code LAURENCE-DUSOSWA | https://laurencedusoswa.com/a/BST | GLOBAL | Bavaria, Germany |
 | Advanced Sim Racing, Ascher Racing, D-Box Technologies, HandsOnPerformance, Heusinkveld, Moza, Novus, OMP, ProSimRig, Simagic, Sim Consultants, Simucube, Sparco, Vero Motion | Sim Consultants | 5% off Simagic with code 'LD' | https://laurencedusoswa.com/a/SIM-CONSULTANTS | EU, UK | Dublin, Ireland, EU |
 | Asetek SimSports, Conspit, Cooler Master, Cube Controls, Fanatec, Logitech, MOZA Racing, Next Level Racing, Nitro Concepts, noblechairs, Simucube, Thermaltake, Thrustmaster | Overclockers (UK & USA) | https://laurencedusoswa.com/A/OVERCLOCKERS | Global | UK, USA | |
 | Advanced Sim Racing, Ascher Racing, BDH, Conspit, Full Push, Moza, Next Level Racing, Novus, Thrustmaster, VPG Sim | Full Push | 5% off with code 'LD' | https://laurencedusoswa.com/A/FULLPUSH | Canada | Canada |
 | Simsonn | Simsonn | 8% off with code LAURENCEDUSOSWA | https://laurencedusoswa.com/A/SIMSONN | Global | Kington, Herefordshire, United Kingdom & China |
 | 3DRap, Another Way, Ascher Racing, Asetek SimSports, Bavarian SimTec, BDH Race Sim, Brook Raslution, ButtKicker, Circuit One, Conspit, Cooler Master, Cube Controls, D-BOX, Dayton Audio, Delta Sim-Tech, DOF Reality, Elgato, EPLAB, Esportsim, Fanatec, FatBlackCat, GSI, Heusinkveld, HORI, KGL Creation Lab, Leoxz, MME Motorsport, MOZA FlightSim, MOZA Racing, MPI, Next Level Racing, Nitro Concepts, Novus, OMP, O-Rouge, OPLite, P1Sim, Pimax, Playseat, Pro Flight Trainer, Prosimu, PXN, Qubic System, Res-Tech, Rexing, Sabelt, Sensit Haptics, SG Racing, Sim Factory, Sim-Lab, Sim Racing Studio, Simagic, Simforge, Simgrade, SimRep, SimRig, Simucube, Simufy, Simsonn, Simtrecs, SimXPro, Soelpec, Sparco, The Mech Cat, Thermaltake, Thrustmaster FlightSim, Thrustmaster SimRacing, Tillett, TORQ, TrackTime, Trak Racer, VERO Motion, VIRPIL Controls, Virtual Fly, VNM Simulation, VPG Sim, VRS, Wheel Stand Pro | Simufy | https://laurencedusoswa.com/A/SIMUFY | EU, Global | Granada, Spain, EU | |
 | AccuForce, Asetek, CAMMUS, Conspit, Elgato (Stream Deck), Fanatec, Gomez Sim Industries, Logitech, Moza, PXN, Simagic, Simucube, Thrustmaster, VNM, VRS, Virpil | Sim Sport Gadget | 5% off with coupon code 'LAURENCE' | https://laurencedusoswa.com/A/SIMSPORTGADGET | USA, Global | Newark, NJ, USA |
| Asetek Racing | Asetek Nordic | 5% off with coupon code 'LD' | https://laurencedusoswa.com/A/ASETEK-NORDIC | ||
 | UGREEN | UGREEN | https://laurencedusoswa.com/A/UGREEN | Global | EU | |
 | Honeycomb | Honeycomb | 10% discount with code LAURENCEDUSOSWA10 | https://laurencedusoswa.com/a/HONEYCOMB | Global | EU, USA |
 | OPVEK | OPVEK | 5% off with coupon code 'LD5' | https://laurencedusoswa.com/a/OPVEK | Global | Shenzhen, Guangdong, China |
Three dials I can read while I’m adjusting them
I’ve run a Precision Sim Engineering Pro Switch Panel for a long time. What tempted me to give up its spot was the row of three dials beneath the TEKTRAMA’s five-inch touchscreen. Each dial has a little screen in the middle. I set mine up with brake bias on the left, ABS in the middle and traction control on the right. Turn the outer ring and you can read the new setting right where your hand is.
There’s enough resistance to feel each click through gloves. There’s also a tiny bit of play in the knobs, though it didn’t bother me driving. The three big dials only rotate. The two seven-way hats give you the push, directional and rotary inputs, and the ten buttons have short travel with a distinct click. The machined aluminium looks lovely. At the price I quoted in the video, I’d have liked that finish to extend to more of the 3D-printed parts.
Getting it onto an aluminium profile rig
The USB side was easy. One cable powers the panel and carries the data. The USB output is there for daisy-chaining compatible units, such as flag indicators. The part that took some head-scratching was getting the panel where I could reach it.
My unit came with a bracket, but I still needed an arm to attach it to the rig. The recommended camera-style magic arm had too little thread exposed to reach the T-slot nut in my profile, and the thread pitch was different anyway. I already owned a two-bolt RAM mount, so I 3D-printed an adapter for that. It holds the panel steady enough to turn those fairly stiff dials one-handed. If you’re planning a similar install, check the rig end of the mount as carefully as the panel end.
How I set up the buttons in SimHub
TEKTRAMA’s own dashboard leaves room on the screen for button labels. I used mine for things like muting Discord, checking damage and changing delta pages. My favourite is “Clear Pit”. In iRacing I can clear the selected fuel and tyre services, then ask for just tyres if that’s what I want. Typing the label in the plugin changes what the button says. You still have to bind the action yourself.
Lovely Dashboard also fits the screen beautifully and the touch controls work with it. I stuck mainly with TEKTRAMA’s layout during testing so I could keep those custom labels. The supplied LED presets made it easy to swap the Italian flag colours for something quieter on my rig. I’d like a brief flash when I press a button, particularly for something like clearing a pit request. Night mode also didn’t kick in straight away during my demo.
What I could actually see in iRacing
With the panel off to my left, the green and red delta bar was easy to pick up out of the corner of my eye. The track map needed a proper look, which is a much bigger ask when you’re trying to put a lap together. The pit limiter animation, on the other hand, was obvious as soon as I hit the button.
That placement suits information I choose when to check. Average fuel use is my pick, and the leaderboard makes sense there too. I can glance across to see who’s around me and what times they’re doing. I have less use for another set of rev lights beside my shifter when I already have them straight ahead. SimHub lets me switch those off.
Would I keep it on the rig?
Yes. I love being able to reach for brake bias, feel the adjustment and see the value on the dial itself. And once it’s lit up, it looks absolutely savage on the rig. Whether that’s worth €650 is a different question. If all you’re missing is a fuel readout, that’s a lot of money for one page. Where the TEKTRAMA earns its place for me is that it takes over the job of my switch panel and gives me a permanent second dash in the same space. Just work out how you’re going to mount it before it arrives.




Add comment